New Subwoofer
Hello!
After having built the center channel RS150 MTM, I realized that my Wayne J’s Veritas front towers with melamine finish did not fit in the decor anymore. The colors and covering are not marching at all. So I’ll be working to recover them with veneer matching the center channel (red oak for the front and black cherry wood for the rest).
I’ll keep your posted with pictures and progress.
Btw, we also decided to build a larger enclosure for a friend’s subwoofer. He has 15″ Titanic MK III Subwoofer and Dayton Audio SPA1000 1000W Subwoofer Plate Amplifier.


I’ll soon post the enclosure plan here too, stay posted!
David
Finally Finished!

After a year (!), I finally finished my RS150 MTM center channel speaker enclosure.
I have to admit that I was working on 2 other speaker enclosures at the same time and this activity was very social (sometime not so productive).
But here we are, today, with the final result.
I hope you’ll enjoy the result. Visit here if you want to see more pictures: http://www.flickr.com/photos/davlaf/sets/72157626144872621/show/
I will be right back on this blog as I will have to change the finish of my 2 main speakers, I’ll be changing the finish of a friend’s subwoofer and repairing another speaker in the coming weeks (and months probably).
David
It is coming to an end
Hello!
I know I may not have been so regular at posting but I’ll try to be a bit more…
This post is only a teaser to tell you that I believe I’ll finally complete this speaker enclosure this week, stay tuned to see the final results and lessons learned. I did some mistakes that complicated the job quite a lot.
Talk to you soon (this week:))
David
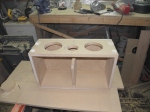
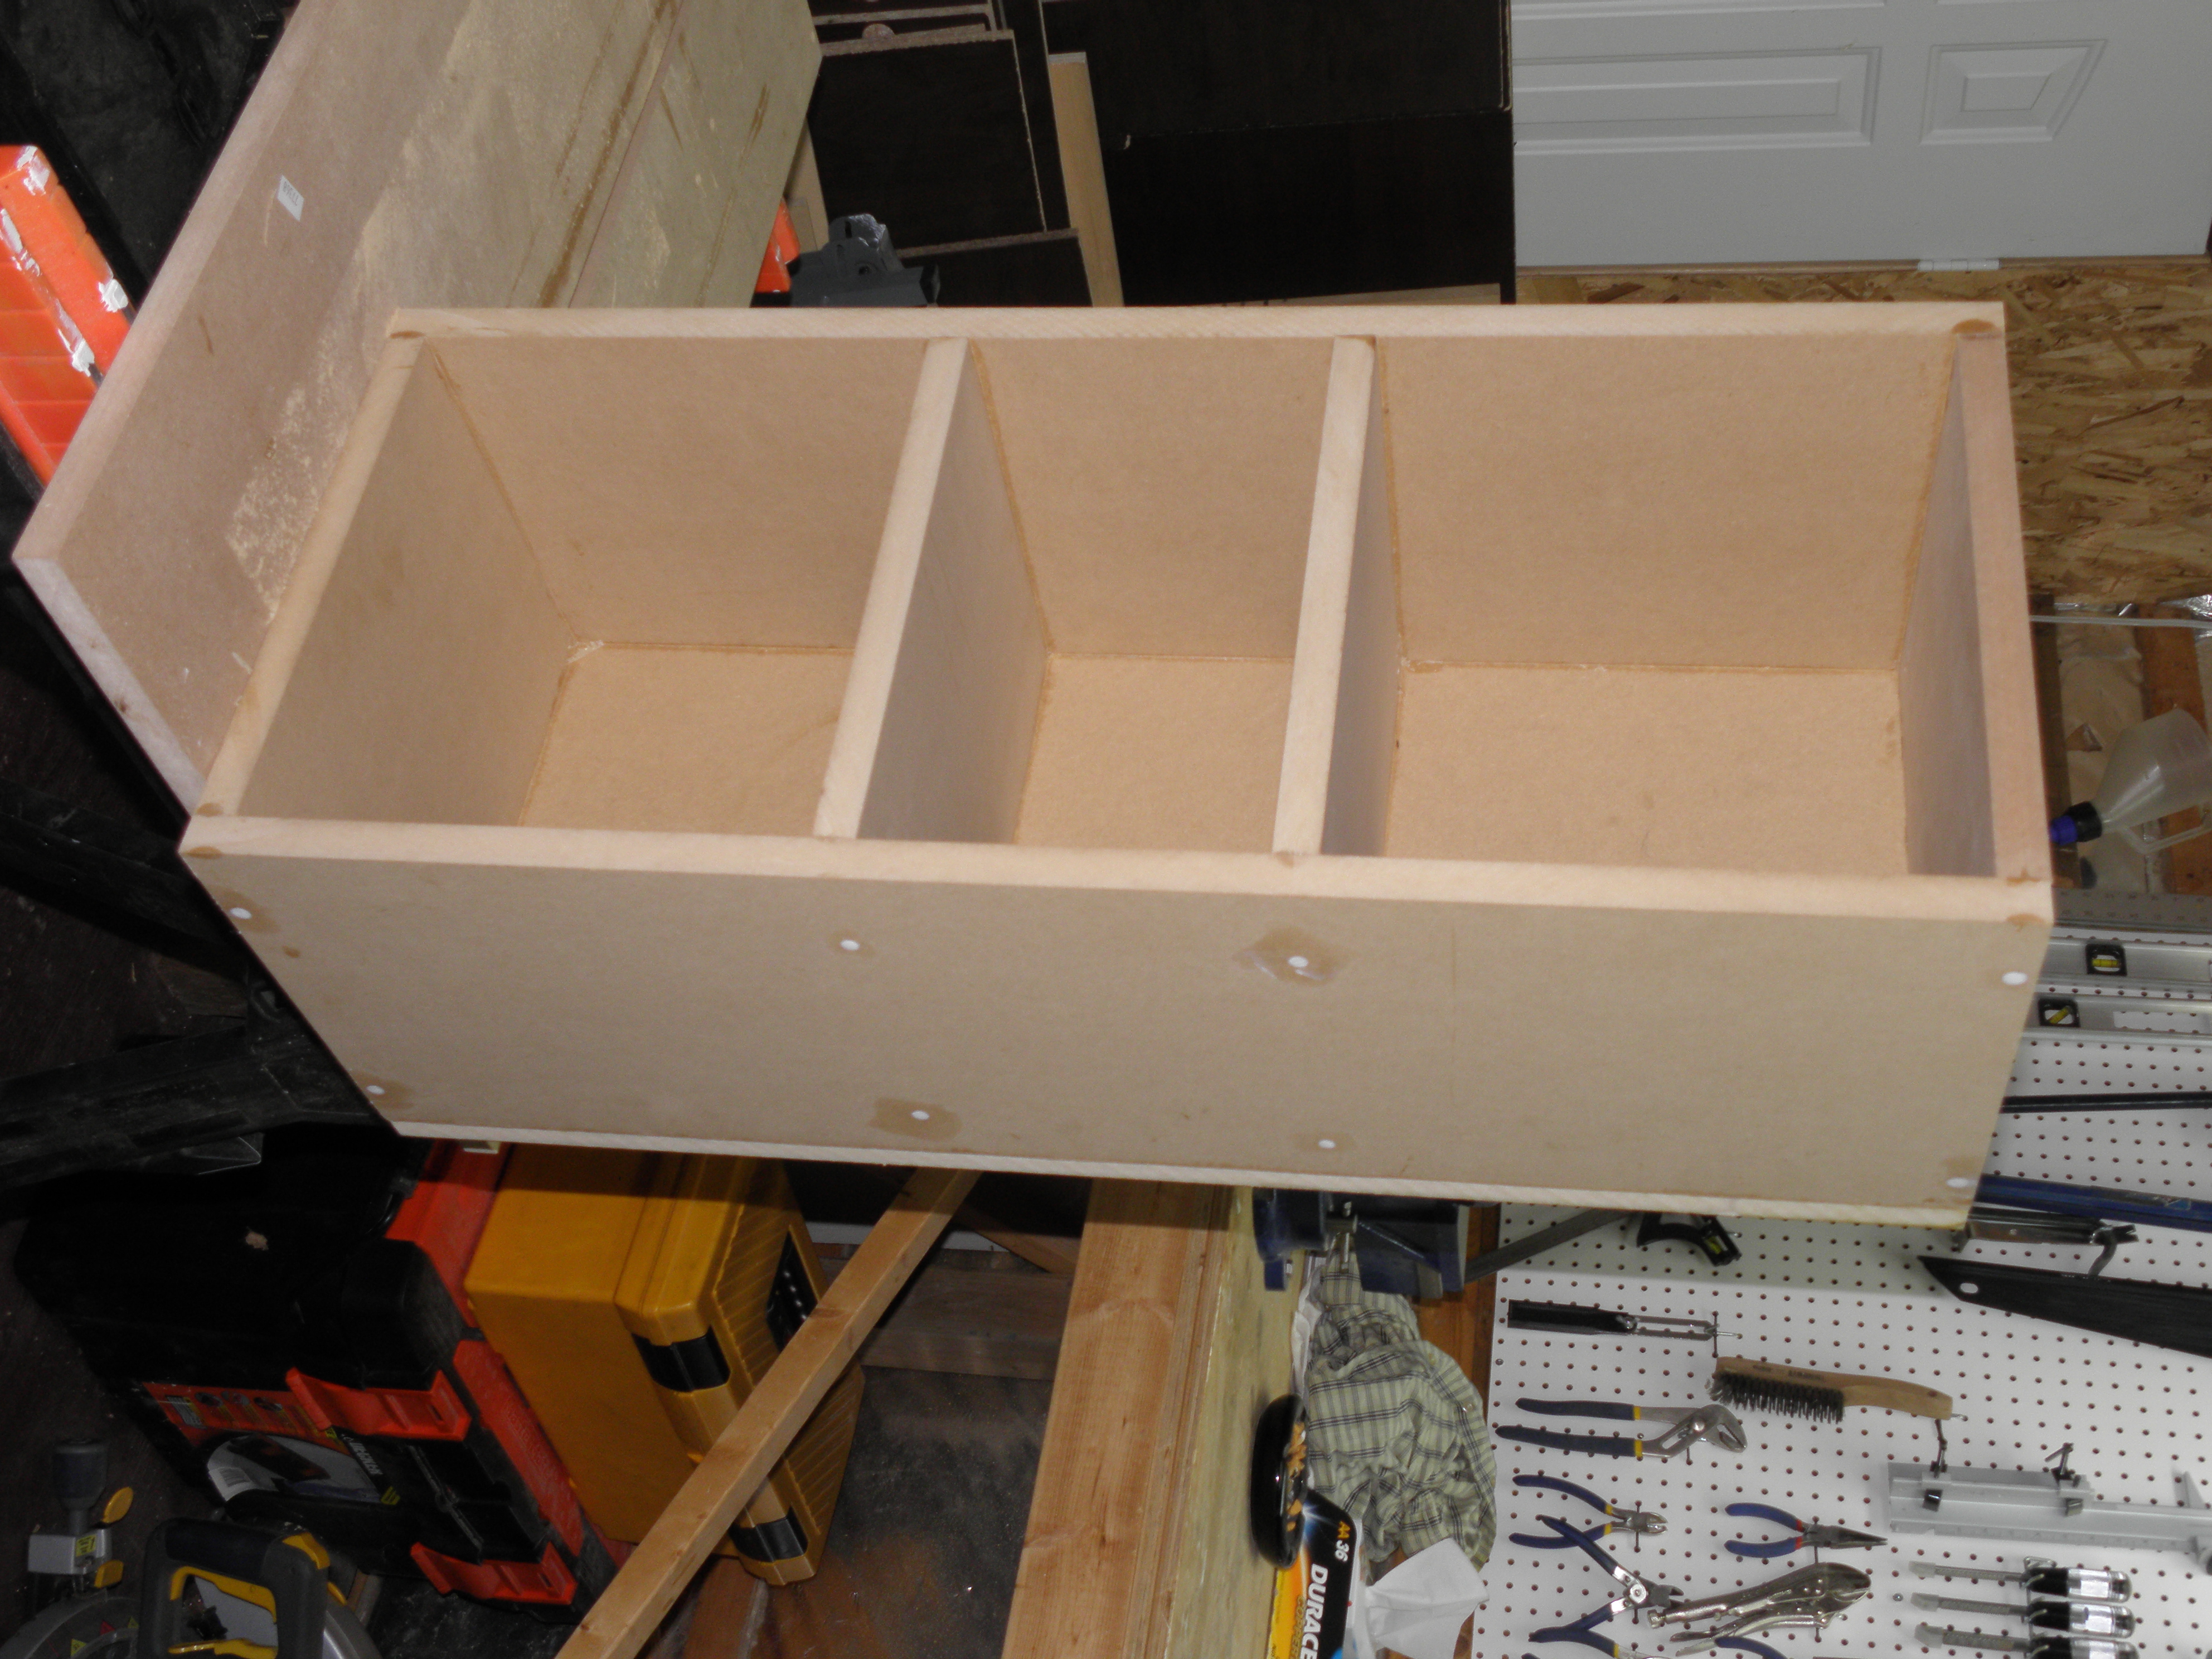
Some Enclosure Pictures
2 posts in 2 days, I’m on fire 🙂
I just wanted to share with you some pictures of the enclosure building.
So what we have done so far is:
- Glue and screw 5/6 panels together
- Glue and screw braces
- Cut speaker holes in front baffle
-
- CJD RS150 enclosure development

-

- Cutting Vince VHT speaker holes in front baffle

This week objectives:
- Cut connector holes
- Put silicon on edges of the enclosure (photos to come)
- Insert T-Nuts holders in front baffle (photos to come)
Future objectives We will soon attack the damping of the enclosure and fixing the pcb. Later we will work on recovring the enclosures with veneer and put an Oak wook over the front baffle to give a great finish!
Crossover Building Details
Hi there,
So I’ll keep my promise this time and share with you some details about the crossovers building. You can find photos below describing the conception of the crossovers.


The result is pretty neat looking and works well (we tested the circuits). We now have to fix these circuits into our cabinets.
Cabinets building pictures to come, stay tuned 🙂
Finally, a post! so crossover you say?
Hi!
I know I haven’t been blogging for a while. I have been pretty busy lately but I really want to make this blog to live!
So what happened in the last… months…
Working few hours / week, we assembled the enclosure and started to work on the crossover. The crossovers for the Vince’s VHT Center channel is fully assembled while the crossover for the RS150MTM. I will receive latest photos of the construction of the enclosure and crossovers and post them here.
We developed our PCB based on the Ultraviolet method:
- We bought Copper Clad Board, double sided and presensitized.
- We printed our pcb plan on a plastic sheet
- We applied the plastic sheet on the Copper Clad Board in a black room and exposed it under a UV light for 8 minutes
- We then used a developper solution from MG Chemicals (http://www.mgchemicals.com/) to remove the coating over the exposed area and leave the pcb tracks (that were printed on the plastic sheet) with a protective coating.
- Since only the pcb tracks had protection and the rest was on copper, we put the board into an acid solution to burn the copper. We used a cheap solution for the mix:
- The etching solution is made by adding 1 part Muriatic Acid (the common kind that’s sold in hardware stores, about $5.00 gal.) to 2 parts Hydrogen Peroxide (the common 3% kind that’s sold in dollar stores & drugstores for $0.50 a pint) – http://www.pbase.com/sinoline/pcb_experiments
- As only the board tracks were remaining, we removed the protective coating with steel wool
- We then soldered parts on the board
[Picture to come in a post coming soon]
David
Crossover Diagrams
Bonjour!
Today I’m bloggin’ about the crossover’s diagrams. So basically we took a sotware to redo our 2 crossover diagrams. I already hear you telling me “Why reinventing the wheel Dave?”
Actually it will be pretty useful. The first step (which took us too long to realize) was to do the components inventory and connect them in the diagram with the software.
The second step will be to define the components dimensions (depth, width, length), the surface, the distance between the tracks, etc. so that the software can tell us the optimal components placement on the PCB.
We orderde two 6″ x 9″ Copper Clad Board Double Sided. However, for the CJD’s RS150 MTM, we will have to limit ourselves to 4″ large since the diameter for the speaker hole on this speaker is slightly larger than 4″. By doing so, if something goes wrong with the PCB, we can just remove the speaker and then remove the PCB.
For the Vince’s VHT Center channel, it will fit nicely.
So here are the diagrams:

CJD RS-150 MTM Crossover Diagram

Vince VHT Center Channel Crossover Diagram
We are supposed to work on the components placement this weekend and we will post here the results as soon as possible!
Have a terrrrrrrrrific weekend!
David
New Project – Vince’s VHT Center Channel as Surrounds
Hi!
As Ill be working on the CJD’s RS 150 MTM, I’ll work on a pair of Vince’s VHT center channel speakers for a friend. He already have one of these as a center channel speaker and he likes the output so he decided to build 2 others as surrounds. Actually, he decided that back in 2006 when we first built the other speakers. You may wonder what happened between 2006 and 2010? Actually we have been working really hard and I’ve been away for more than a year so we did not have the chance to work on these projects until now.
This week we noticed that some components of the projects changed on the project’s website. It is mainly the tweeter that was originally a Vifa PL27TG and is now a Vifa D27TG. We did not have the tweeter but we had all the other components. So we had to do with this change. The specs are very similar except for the power handling that was 100 watts RMs for the PL27TG while it is 25 watts RMS for the D27TG.
You can find the Vince’s VHT Center Channel specs here: http://www.parts-express.com/projectshowcase/indexn.cfm?project=Vht
Slowly But Surely (?)
Heydo!
I am sorry for the wait between the last post and this one. Actually, I had not much to write about so I prefered to not write at all.
So right at the beginning of this project we started to have some problems. We noticed a difference between the crossover diagram and the bills of materials. Actually, the diagram included a 1.3mH inductor while the bills of material was including a 0.9mH inductor instead. So I wrote to CJD and he answered my about 12 hours later (wow!) confirming the little mistake. So I had to order the missing component.
We started to work on the deisng of the crossover. WE are looking for the optimal components placement on the PCB to achieve the optimal PCB.
I will upload PCB schematics soon!
New Project: RS150 MTM by CJD as center channel speaker
Hi again!
Today is a big day because I’m introducing the first project I’ll work on and describe in this blog :). Right now, as a center channel speaker I have a Hifi Quest QC5 as you can see below. I received this speaker as a gift many years ago and I did a good use of it. Now that I have some pretty massive speakers all around (front, rear and sub), the little Quest can’t follow…


Now here’s the project that I’ve selected: RS150 MTM by CJD. You can visit the official page of the designer here: http://www.eldamar.net/audio/RS150MTM/#seas27tdfc
Why the RS150 MTM Design by CJD?
I selected this project because of its acoustical and aesthetic design. The acoustical response graph (on the designer’s website) is pretty impressive. Also, the crossover seems to be nothing standard (had to purchase my components from three different suppliers!). Moreover, I will be going for the sealed design due to some space constrains and the fact that I don’t need the lower extend since I’ll be using it as a center channel and not a front or rear. I will also be able to gain on decibels by having a sealed design.
You can see the box design here: http://www.eldamar.net/audio/RS150MTM/graphics/enclosureDesign.png
The Components
This design’s components are pretty unusual. The SEAS 27tdfc tweeter has been pretty hard to find. Some capacitors and inductors have also been difficult to find. Here is my bill of materials:

Please take note that I selected most of my Parts from Solen because it is the nearest place from where I live and it is the only Canadian supplier from all three. Also, consider the high shipping cost from Parts Express and Madisound is mostly due to the fact that I live in Canada.
Next Steps
My next step will be to contact the person I’m building the speakers with. I’ll go buy the MDF and some hard wood for the front. My plan is to put some blackish melamine / material on the sides, back and bottom and to put a piece of real wood that I’ll varnish and do something nice with the edges. We will also start working on the PCB design as we are building a real PCB (kinda like the one below we previously built for another design)

Crossover from a previous design
I’ll keep you updated as soon as there is some developments on this project!
David
